Thursday, August 29, 2013

On a Mission: Meal Planning Day 4

Pasta pasta pasta! Per my hubby's request, I made a pasta dish last night. Pasta alla Norma is a spicy eggplant and tomato combination. I love anything with eggplant! I also love any pasta dish that involves veggies. I always decrease the amount of pasta and up my portion of veggies. Here are some of my pasta veggie secrets:

- In the last 2-3 minute of pasta cooking time, add in strands (made with a vegetable peeler) of zucchini and summer squash to your spaghetti.
- Make a sauce out of roasted, pureed butternut squash 
- Make a "no-cook" sauce out of tomatoes, roasted red peppers, garlic, basil, and olive oil. The warm pasta will heat the sauce and veggies, bringing out the flavors! Add in some shredded low-fat mozzarella for the ooey gooey factor.

Pasta alla Norma is a quick dish and can be made in ~30 minutes. You can double or triple everything and save the sauce in the freezer for a delicious lunch or light dinner anytime! It would be great with crumbled hot Italian turkey sausage. 

Pasta alla Norma
3/4lb rigatoni pasta 
1 medium eggplant sliced into rounds 
1 can plum tomatoes, crushed by hand or snipped with poultry shears 
3 cloves garlic, minced
1tbsp olive oil
1/4 tsp red pepper flakes
2tbsp crumbles goat cheese
1/4 cup fresh basil, sliced in strips
Salt and pepper to taste

Cook pasta according to package directions, drain and set aside.  Heat olive oil over medium heat in sauce pan. Add garlic and red pepper, stirring until fragrant. Add tomatoes, bring to a boil and continue to simmer ~20 minutes. Meanwhile, salt and pepper eggplant rounds. Heat a nonstick grill pan to medium high heat and grill eggplant rounds until soft and browned. Chop eggplant into bite size pieces and add to tomato sauce. Pour sauce over pasta and toss until well coated. Serve with fresh basil and goat cheese on top.

To freeze
Prepare sauce only with eggplant. Freeze in freezer safe plastic bags and lay flat to freeze. 
To eat:
Defrost sauce in refrigerator overnight. Reheat on stove top until boiling. Serve over rigatoni with basil and goat cheese. 


Enjoy!!

Stay tuned for my next meal planning in a mission recipe: chicken artichoke bake!


Tuesday, August 27, 2013

Pumpkinpalooza: Pumpkin Pancakes!

Pumpkin Pancakes


I would have to say that my next favorite thing other than the fall season is breakfast!! Breakfast is my favorite meal of the day, and for good reason;  it's just delicious! So with that, I have found and perfected a pumpkin pancake recipe that will have your house smelling amazing and make you smile this pumpkin season.  Pancakes just hold a special place in my heart, they remind me of being a kid and make me happy! You can make them any size and shape, or just leave them alone and add toppings!!  Whatever you desire or however you like them, I promise you’ll clean your plate with this recipe! It is a must try and will maybe even become a Halloween or Thanksgiving morning tradition!

Cook with love,


Ingredients

1 ½  cups all-purpose flour
1 ½ tbsp. brown sugar
2 tsp. baking powder
¼ tsp. salt
¾ tsp. ground cinnamon
¼ tsp. ground nutmeg
Dash of ground cloves
1 cup milk
½ cup pumpkin puree
1 large egg
2 tbsp melted butter

Directions

In a medium mixing bowl, combine the flour, brown sugar, baking powder, salt and spices.  Mix together the milk, pumpkin puree, egg and butter.  Add the wet ingredients to the dry ingredients and whisk together just until combine. (the batter may be lumpy and its ok)

  Heat a greased skillet or griddle over medium heat. (freezer friendly tip: let the griddle get hot on med heat for at least 5 min before adding your first ½ cup batter)  Once the skillet is hot, add a ½ cup scoop of batter to the pan.  Leave alone until bubbles begin to form on the top surface.  Carefully flip and cook the second side until golden brown! Continue this step until the batter is gone.  Serve with warm syrup and enjoy!!!

To Freeze: allow pancakes to cool, wrap individually with wax paper and then store in a freezer bag. Date and label

To Eat: Defrost completely, heat in the microwave on high 30 sec to 1 min for each pancake

Monday, August 26, 2013

Sunday Funday: Draft Day Pulled Pork

Sunday Funday: Draft Day Pulled Pork

You.  Guys. 
Or should I say “yous guys” ‘cause I’m from Jersey?
Either way:  go out to the store and get a pork shoulder (also known as pork butt) right now.  GO!  This is a must make.  And, it was so super easy to boot.   I had to cook for a crowd this weekend (and when I say crowd…we’re talking 15+ loud, hungry, smack-talking fantasy football owners).  We had our fantasy football draft this Saturday and it was so much fun!!  We take football and football food pretty seriously around here, so I knew just throwing out some dips and chips wasn't going to cut the mustard.  I love pork.  I love pulled pork.  AND Beth and her husband Jeff make the most yummy homemade BBQ sauce. I love to smother my pork in it.  So I knew I wanted pork on the menu.  I don’t know about your stores, but pork shoulder is usually always on sale or a good price in my supermarket.  It was only 99 cents a lb this week! Which was nice, because I got about 16 lbs of pork! I got the idea to brine my pork from Kevinandamanda.com.  I don’t know why I've never thought of that before…I've brined chicken and turkey…I guess those wires just never crossed in my head.  Well, I did it and I totally suggest it! I used my own blend of herbs and spices for a dry rub then roasted the shoulders over night in the oven.  My word-did the house smell divine.  The best part about roasting over night is timing.  I was not rushing around at all before the draft and was able to clean up and keep the pork warmed in the oven until everyone arrived.   The best part was that it went! It went fast! I only had a few measly bites left over.  AND my friend Carla had made about 5 lbs of baked ziti which was all gone too.  And of course, we did have chips, dips and desserts. 


Draft Day Pulled Pork

8lb pork shoulder bone in and skin on (aka pork butt)
Garlic cloves

Brine:
1/2 cup salt
1/2 cup brown sugar
2 qts cold water
3 tbsp dry rub mix
2 bay leaves
Add salt to cold water and stir very well until all the salt is completely dissolved. Then add the brown sugar and dry rub and stir well to combine.
Place pork shoulder in a large pot or bag and pour the brine on top. Make sure that your shoulder is completely covered in the brine. Add bay leaves.  Allow to sit for at least 8 hours.
Recipe from: www.kevinandamanda.com


Dry Rub:
2 TBSP kosher salt
2 TBSP sugar
2 TBSP brown sugar
3 TBSP ground cumin
2 TBSP chili powder
1 TBSP black pepper
1 TBSP cayenne pepper
3 TBSP paprika
1 packet of Goya sazon seasoning

Combine ingredients and stir well. Set aside.


Instructions:
1.       Make dry rub and set aside.
2.       Make brine as directed and allow pork shoulder to sit in brine for at least 8 hours.
3.       Remove pork shoulder from brine and pat dry with paper towels.
4.       Place pork in a (disposable) roasting pan skin side up and rub liberally with dry rub (reserving some for later).  Really get to know your pork and get that dry rub in every nook and cranny.
5.       With a small sharp knife, cut slits and insert peeled whole garlic cloves (about 5-8 total) all over the top of the pork shoulder.
6.       Place the roast in a preheated oven (225F—slow and low, right?!) and allow to cook until an internal temp around, but not above, 200F is reached.  This will probably take anywhere from 10-12 hours, depending on the size of your roast.  Remember, this recipe is for a 7-8lb pork shoulder. 
7.       Allow to cool and come down to temp (170) and remove skin and any excess fat.  Pull meat off the bone (should practically fall off on its own!) and shred with two forks. 
8.       Sprinkle 1-2 TBSP of the dry rub on the pork until it tastes just right to you!
9.       PIG OUT (hahahah I have to laugh at my own jokes)

I served this pork on rolls with two choices of BBQ sauce for my guests. It didn’t last long! I hope you enjoy!


Go team!

Sunday, August 25, 2013

On a Mission: Meal Planning Day 2

Yesterday was a laid back kind of day.  My hubby and I had a birthday party at 7:30 so I knew I wanted to eat before we left.  If I don't feed my husband he has a tendency to get "hangry".  Unsure if there were going to be snacks at the party, I wanted to make something filling, but quick and easy.  Hearty Black Bean Soup was my plan!!

The star of this soup are the Kuner's canned beans.  They come seasoned with chili powder and cumin.  They make a great side dish on taco night too.  My secret (maybe its not that secret) is to puree 1 can of beans with a little bit of chicken broth and keep the other whole.  It makes the soup creamy and thick! This trick works in other soups like Tuscan White Bean soup and any chili recipe!


Hearty Black Bean Soup
2 cans Kuner's black beans with chili and cumin (or substitute canned black beans with the added spices)
2 cups cooked brown rice (I used a mixture of brown rice and quinoa)
1 small onion, chopped
1 can Rotel
1 cup plus 1/4 cup low sodium chicken broth
the zest of 1 lime
Optional:
Fat free plain Greek yogurt
low fat shredded cheddar or Monteray Jack cheese

Combine 1 can black beans and 1/4 cup chicken broth in a blender and pulse until smooth and creamy, set aside.  In a medium size saucepan saute onion until soft.  Add the can of Rotel and let cook until the tomatoes start to bubble.  Add lime zest, pureed black beans, remaining broth, can of beans, and rice.  Bring everything to a boil, reduce heat to a simmer and cook for 30 minutes.  Serve with a dollop of fat free Greek yogurt and shredded cheese!

To Make Freezer Friendly:
Follow recipe above and fill freezer safe bags with soup.  Lay flat in freezer for better storage (I lay them in a casserole dish in case there are any leaks).
To Reheat:
Defrost overnight in the refrigerator.  Microwave a bowl until bubbling and heated through, 165F or bring to a boil on the stove top. 


Enjoy!!

Stay tuned for my next meal planning on a mission recipe!


Saturday, August 24, 2013

On a Mission: Meal Planning Day 3

Today we had friends over to visit lil Ben. I knew I wanted to cook dinner when they left because, frankly, I wouldn't feel like leaving the house! My RU girlie, Elaine, brought me a few beautiful heirloom tomatoes from her garden. So, I decided to make my Italian style bangers and beans!

In this pic I used grape tomatoes, but you can use whatever tomatoes you have on hand - I had gorgeous green zebra tomatoes!

Italian Bangers and Beans
4-5 sweet or hot chicken sausages
1 pint grape tomatoes or 3-4 diced tomatoes, pulp included
1 zucchini, diced (you can also use summer squash, eggplant or a mix of all three)
1 can cannellini beans, drained and rinsed
3 cloves garlic, minced
1/4 cup water
1/4 cup fresh basil, torn into pieces 
1/2 tsp red pepper flakes 

Sauté chicken sausages in a pan with 1 tbsp oil until browned, but not cooked through. Remove from pan and set aside. Add zucchini to pan and cook until slightly soft. Add tomatoes, red pepper, and garlic, sauté until fragrant. Add water and beans and bring to a boil. Reduce heat to low and simmer until sausage is cooked through, ~20 minutes. Add fresh basil before serving with crusty bread and a salad. 

To make freezer friendly:
Follow recipe above (leave sausage whole or sliced into thick rounds). Once cooked, place sausages at the bottom of a freezer safe plastic container. Top with the bean and veggie sauce and secure with lid. 
To reheat
Defrost in the refrigerator overnight. Microwave contents until hot and bubbly, 165 degrees. 

Stay tuned for my next meal planning on a mission recipe

Meg Loc :)


Friday, August 23, 2013

On a Mission: Meal Planning!

Boy was I on a mission this week!  When I say our cupboard was bare, I mean we were out of even staples like olive oil, peanut butter, milk, etc.  Somehow my chores never really get done with a newborn around!

My hubby and I did two shopping trips to restock our empty shelves, fridge, and freezer (well, I had plenty of freezer meals).  We went to our local supermarket and wholesale club.  These are the meals I shopped for:

Pasta alla Norma - a tomato/eggplant pasta sauce
Italian Bangers and Beans - something I've adapted from Extra Virgin
Pork and Apples - one of my favorite combinations!
Hearty Black Bean Soup - we like to eat this for lunch!
Baked Chicken and Artichokes - my Aunt made this for me when Ben was born and I plan on making a lighter version

Up first, pork and apples!  I had a 2 1/2lb pork roast in the freezer that I've been dying to use.  I didn't want to use it for pulled pork so I remembered one of my favorite dinner combinations: pork chops and applesauce!  I also decided to plop everything in the slow cooker.  Yummo! 


Sweet and Smokey Pork and Apples
2lbs center cut pork chops or roast, trimmed of visible fat
3 gala apples, diced with skins on
2 tbsp brown sugar
3/4 cup water
2 tbsp dijon mustard
1 tsp cinnamon
1 1/2 tsp chipotle seasoning
1/4 tsp cayenne
2 tbsp apple cider vinegar

Mix sugar, water, mustard, cinnamon, chipotle, cayenne, and apple cider vinegar in a small bowl until sugar is dissolved.  Place fresh (or slightly frozen) pork roast or chops in slow cooker.  Pour mixture over the pork and top with 1/3 of diced apples.  Cook on low 6-8 hours (depending if you put pork in frozen or fresh).  In last 4 hours of cooking time add the remaining apples.  Serve pork with sauce and apples poured on top!
*I like to put some meats in the slow cooker frozen because they shred less and hold up their shape.

To make freezer friendly:
Place the pork in a freezer safe bag with sauce and diced apples.
To cook:
Follow directions above, but place all apples in slow cooker initially. 

Stay tuned for my next meal planning on a mission recipe!


Wednesday, August 21, 2013

Pumpkinpalooza!

pumpkin-recipes

So it's that time of year again! Yup, pumpkin season!! Yoga pants, fall bags, pumpkin spice lattes, Uggs, leaves changing and pumpkin picking!  Fall is my favorite time of year and with that I love to get in the kitchen even more and bake up some of my fall favorites for me and my husband (who never minds the taste testing)!!  During this fall season I am going to share with you some of my favorite pumpkin recipes: cakes, pies, smoothies and more!! Be sure to sign up to follow by email so you don't miss any of these recipes...who doesn't love pumpkin?!
 My first recipe is one of my all- time favorites and has become a Thanksgiving morning breakfast must have in my house! Freezer Friendly will have a Thanksgiving day go to meal plan, but I needed to bring this recipe to everyone’s attention early on in the season.  I guarantee that it will be made at least five times before turkey day!!  My first Fall Favorite pumpkin recipe is: Pumpkin Bars!!!

 I found this recipe a few years ago when I wanted an alternative to pumpkin bread and I have been in love ever since. I have made up my own topping for these bars. I got the idea from my pumpkin mousse trifle recipe which layers ginger snaps, whipped cream and pumpkin mousse, yea I know, why didn’t I start off with that but I swear this is just as yummy.  I don’t put the whipped cream topping on them unless I am making them for company or for a special occasion. I typically do not have the patience to wait for them to even cool let alone make the topping for them before I eat half the pan!! So try them both ways but make sure you make the topping because its delish! Enjoy these easy cake bars with a cup of pumpkin coffee and I promise your fall season will be started off right!!!  
Cook with love, 

Pumpkin Bars
Ingredients
-4 eggs
-1 2/3 cups granulated sugar
-1 cup vegetable oil
-15 oz can pumpkin
-2 cups sifted all purpose four
-2 tsp baking powder
-2 tsp ground cinnamon
-1 tsp salt
-1 tsp baking soda
(recipe adapted from www.foodnetwork.com/pauladeen)
Whipped cream topping
- 1 cup heavy cream (cold)
- 2 TBP of powdered sugar
- 20 ginger snap cookies crushed
Directions
Preheat oven to 350 degrees F.  Using an electric mixer at medium speed, combine the eggs, sugar, oil and pumpkin until light and fluffy. Stir together the flour, baking powder, cinnamon, salt and baking soda. 

Add the dry ingredients to the pumpkin mixture and mix at low speed until thoroughly combined and the batter is smooth.

I usually place the mixing bowl and whisk attachment in the fridge at this time to get them nice and cold for the icing.  Spread the batter into a greased 13 by 10 in baking pan. Bake for 30 min. Add both the heavy cream and powdered sugar into the mixer and whisk on low to incorporate both ingredients then whisk on high until you see peaks. After the whipped cream is ready, fold in your crushed ginger snaps. Spread evenly over the bars, cut and serve. Or you can cut the bars then pipe the whipped cream over each bar to make it pretty!!


To freeze:

I would typically not freeze this batter  I would try to make it fresh. But I have opened up cans of pumpkin puree before and not used it all and have frozen the remaining and that thawed perfectly.  You can also make the bars, cut, cool and then freeze them.  Wrap each bar tightly in plastic wrap then place in a bag or tightly sealed Tupperware container.  You could freeze the icing though, make it in large batches then freeze left overs or doubled batches for future use.  To thaw icing:  Place in the fridge only, do not place on the counter because it can spoil, allow it to be smooth enough to spread.

Monday, August 19, 2013

Sunday Funday: Party Dips


Some like it Hot…
                So I’m a little over due with my Sunday Funday post, but here it is! I am so excited to share this dip with you because I’m pretty sure it’s the reason I fell in love with football.  I started to go to the games to spend time with Joe; I stayed for the food, specifically this one!  It’s a yummy warm cheesy gooey taco dip.  This recipe comes from Joe’s aunt Trish.  It’s so super simple and SO YUMMY!  It screams Sunday Funday!


Hers:
I like it Hot dip:
{serves a crowd}
1 package of cream cheese, softened
1 jar of salsa (no fresh…too runny!)
1 bag of shredded cheddar cheese
 1.       Spread the softened cream cheese in an even layer on the bottom of a pan (even better if it’s disposable!).


2.       Pour the jar of salsa on top and spread evenly.
3.       Sprinkle the whole bag of cheddar cheese on the top.


4.       Bake for about 30 minutes in a preheated 350 oven.


5.       Stir and serve immediately. 
6.       Repeat the process.  It’s that good.


…Some like it cold

                If you’re more of a cold/room temp kinda dip person then this dip is for you.  It’s Angela’s recipe, but I’m going to call it Joe’s Taco dip because Angela isn’t allowed over unless she brings this dip.  Joe has literally eaten the whole thing in one sitting.  What can I say…we take dips very seriously around here. 
His:
Joe’s Taco Dip (via Angela)
{serves a crowd}
1 package of cream cheese, softened
1 jar of salsa
1 bag of shredded cheddar cheese

1.       In a bowl, stir the softened cream cheese.  Add the salsa to combine thoroughly.
2.       Spread mixture into a pan.
3.       Sprinkle cheese on top.
4.       Let set in fridge for 30 minutes.
5.       Inhale and repeat.

This cold dip would be perfect if you’re going somewhere else to watch the game and aren’t sure if you’ll have access to an oven to cook the dip.

Freezing the dips:  I wouldn’t make the dips and then freeze them.  They are very easy to put together last minute.  You CAN however, stock up on cream cheese when it goes on sale and freeze that right in the package.  Also, you can freeze shredded cheese—just make sure to buy a block of cheese and shred it yourself THEN freeze.  Pre-shredded cheese doesn’t freeze very well. And salsa in a jar has a nice shelf life so if you stock up, these should be pretty easy dips to toss together last minute!

If you’re looking for a dip to make ahead and just cook on game day, try this dip
Ours:

Hot buffalo chicken dip
{serves2-4}
2 chicken breasts*
1/3 -1/2 cup Frank’s Original Red Hot Sauce
1 TBSP butter, melted
½ a block of cream cheese, softened
½ cup shredded mozzarella cheese

1.       Melt the butter in the microwave.
2.       Combine the cream cheese, melted butter and hot sauce.
3.       Put chicken breasts in crock pot and cover with mixture.
4.       Cook on high 4 hours.
5.       Shred chicken in sauce, add cheese and serve immediately!

TO FREEZE THIS DIP:
1.       Melt butter and combine with softened cream cheese and hot sauce. 
2.       When mixture is cool, add uncooked chicken breasts and sauce into a freezer bag.
TO EAT THIS DIP:
1.       Pour ingredients into crock pot and cook as directed.

**You could also make this dip with cooked, shredded chicken breast:  Combine all ingredients and bake in a 350 oven until bubbly, about 25 minutes.**


We had some friends over last night and I made my hot dip…we obviously inhaled it.  I won’t even lie…I paid more attention to the dip than the game.  And that’s no good because my fantasy football draft is this weekend!


Go Team!


Wednesday, August 14, 2013

Meal Planning & Shopping 101

Today’s topic: Menu/Meal Planning.  I am excited to write about this topic.  It’s one I've been thinking about and planning for a while now.  I wanted to find a way that worked for me each time I went shopping and I've finally found it!  I've been using this method and these printables that I've made since the spring, with a few tweaks here and there -- I've made some sections larger and some smaller.  I've also tried printing double sided, but I’m visual and like to see both sheets at once!  Here are the printables I use & how I use them:


meal-planning-list
food-shopping-template


(Click here for a PDF version of the printables!)

These work for me for a variety of reasons:
*I don’t like to spend time grocery shopping every week, so by meal planning and making my list accordingly, I can spread my shopping trips out to every 2-3 weeks.
*Not taking so many trips to the grocery store saves money!
*By knowing exactly what I’m going to cook, I can plan my list accordingly so there’s no playing the game: "what the heck am I going to make for dinner with these ingredients."  (Because sometimes it can be like an at home version of “Chopped” and that’s no good…you’ve seen what’s in those baskets!)
*Having my shopping list by section really helps me breeze in and out of the store and brings my “shoot-I-forgot-to-get-this" down to a minimum. 
*I also can see at a glance which of my meals (or parts of) I can prep for the freezer ahead of time and I usually can get most of that done during my daughter’s nap time.
*I ALWAYS keep my menu list easily accessible.  I know what meals I can make with what I have…and I can give my husband options on what he’d like for dinner so it’s a win win. 
*By using the shopping list in sections I can easily see at a glance what the bulk of my purchase is…am I buying too many canned goods? Not enough protein to get us through a few weeks? Have in included enough fresh produce? (I will make spot trips to the store for fresh produce!)

Let’s get started using these bad boys!
1.       First, I sit down with a cup of coffee (or wine…) and scour my pin boards with my sheets at my side.  Here are some screen shots and links to my boards…

                                 What's for dinner?                                        Freezer Friendly

                                     Lunch Time!                                                Sunday Funday


2.       I’ll add recipes to my menu as I find meals that I know my family will enjoy.  I also enjoy finding a variety of meals so I’m not getting into a rut of making the same thing. 

meal-planningmeal-planning


3.       I also make note on my menu if a recipe will make two meals (x2) or if it’s freezer friendly (F) so I can check that at a glance.

4.       Once I have my meals planned out, it’s on to the shopping list.  I actually print the shopping list about a week before I go shopping so I can add extras to it as I run out (baking soda, toilet paper, etc.  Things that we need, but might not be specifically in my meals).  I sit down with each recipe (or think about it in my head if it’s one I’ve made over and over) and the ingredients I don’t have in the pantry or fridge get added to the list.
meal-planning

(Don’t mind my sloppy handwriting or atrocious spelling.)


On my list I’ll make myself notes like what I’m using the ingredient for or if it’s on sale at the store.  So once I have all of this, I’ll head out to the store and shop!  If I’m really feeling ambitious, I’ll print out a calendar and write down our dinners on it so I have a blueprint of the next few weeks.  But more than likely that changes anyway.  Like I said before, I do make spot trips to the store for things like produce and milk for Harp.  But this really cuts down on my trip totals and the money I’ve been spending on groceries.  I hope this helps make life a little easier for you!  I’d love to hear if you used it or how you did.  Would you make any changes to the printables? I’d love to hear your suggestions!


Stay full!


freezer-meals

Friday, August 9, 2013

It's FOOTBALL SEASON!

game-day-chili


I am so excited to type up this post while I'm watching some FOOTBALL!  I love football season... it means great weather, pumpkin spice lattes, food, friends and smack talk.  I'll admit, I used to be the "football widow" (and by widow, I mean girlfriend, because my husband and I are high school sweethearts so really we're talking like 17) and not see my man on Sundays...or Monday nights...or even have his full attention during football season.  I used to hate it!  Then, I realized...maybe it's not so bad.  I started to go with him to watch the games (specifically the Eagles--yup Philly phans in the house) and there was food and food and some more food to be enjoyed during the games.  I even started to understand and ahem, enjoy, the games. Now not only was my husband into watching football, he was into playing fantasy football.  And I don't mean he just had one team...no, no.  He would have several different teams in a season!  Well, fast forward a few years and we started a league for our friends and family and I finally got my own team!  And guess what? I'm GOOD! That's right, I won the championship my second year playing! Oh, how my husband has still never heard the end of my victory! (Although I will give him some credit, because he won the following year.) Well, football season is here and I'm so excited because really that means my house will constantly be full of our friends and good food...and smack talk.

So here is the first of many "Sunday Funday" blog posts!  I'll try to keep as many of the recipes as freezer friendly as I can.  But I am so excited to share some of my game day favorites that some might not be ready to go right from your freezer!  Today happens to be the first Eagles preseason game (against the Pats) and it's also my brother in law's 24th birthday (Happy birthday, Tony!) and he requested chili for his birthday dinner.  I never make chili the exact same way twice, but I made sure to pay attention to my ingredients and measurements today so I could share it with you.  But when it comes to chili, go with what feels right! I did add chipotle in adobo today which was new for me and I loved the results!


Game Day Chili
{serves 6}
3 lbs ground beef
2 28oz cans diced tomatoes, drained
3 bell peppers, chopped (any colors)
2 medium to large onions, chopped
3 cloves garlic, chopped
1 jalapeno, chopped (can omit if you'd like to lower the heat level)
1 small can, chiptole in adobo
2 TBSP tomato paste
1 6oz can tomato sauce
3 tbsp chili powder (more to taste)
1 tsp cumin
1 tsp paprika
salt and pepper

Directions:
game-day-chili

1. Heat large dutch oven and add beef.  Break apart as meat browns.
2. As meat browns, roughly chop bell peppers, onions, jalapeno and garlic.
game-day-chiligame-day-chili
3. Remove meat from dutch oven, draining off fat.  Add chopped veggies to hot dutch oven and saute until soft, about 5-6 minutes.  Season with salt and pepper.
game-day-chili

4. Sprinkle seasonings over meat mixture and stir.
game-day-chili

5. Add tomatoes, chipotle in adobo, tomato paste and tomato sauce to peppers and onions and stir to combine.  Allow to cook for 5 minutes.
game-day-chili

6. Add meat and seasoning mixture back into dutch oven.  Stir to combine all ingredients.  Allow to cook together for 5-10 minutes.  Once meat is completely cooked through, taste and adjust seasoning to your taste.
7. Allow to simmer for as long as possible...chili only gets better as it sits!

Serve in deep bowls with shredded cheese, diced onion, and sour cream on top.

Extra notes:
*The chipotle in adobo adds a lot of spice, so if you're someone who doesn't like a lot of heat, I'd just add some of the sauce from the can and leave the jalapeno out.*
*If your chili needs more liquid, I add beer or beef stock*
*Want to stretch this further? Cook 1/2 lb small pasta (small penne works great) and add cooked pasta to chili mixture and stir to combine!*

To make FREEZER FRIENDLY:
Cook as directed, allow to cool completely and ladle chili into Tupperware containers and freeze!  To eat microwave or heat on stove.

Go Team!
freezer-meals


Tuesday, August 6, 2013

Crock Pot Wonders

crock-pot-recipes


Crock Pot Wonders
I know a few of my last posts have been crock pot meals, but I just can’t help myself.  They are so easy and such a great go-to for those lazy (or super busy) days!  I find myself using up a few crock pot meals in the days right after I do a big cooking day.  I’m usually tired from all that cooking, but more so I just don’t want to do any more dishes! My husband laughs, but I’m serious…when we remodel our kitchen I told him most people go for the double oven.  Well, I’m starting a new trend: double dishwashers!  I’m telling ya, I’m gonna make it happen!

But anyway, back to the topic at hand: crock pot meals.  I also think crock pot freezer meals are great because if you do a large cooking day and prep all at once, you’re not actually cooking! Plus, the crock pot makes the house smell yummy AND you can use a liner so little to no clean up.  Prepping crock pot meals is a great way to get started and boost your confidence in freezer cooking.   I've come up with a list of our favorites that are super easy to prepare and super easy to eat!  We also have a Crock PotWonder pin board for you to follow!  All of these dinners we have tried (or created) ourselves and enjoyed.  Below are the recipes with our adaptations and freezing instructions!  We hope you enjoy and let us know what your favorite crock pot recipe is!

Stay full!
freezer-meals


Winner Winner, Chicken Dinner
1 whole oven roaster (size depends on your crock pot)
Butter
2-4 Large Baking potatoes
Onion, celery & carrots
Fresh herbs of your choice

1.        Rinse and dry your chicken, removing any giblets inside
2.       Rub your chicken liberally with softened butter.  Season with salt and pepper and fresh herbs.
3.       Place carrots, celery and onion (large chop) in the cavity of the chicken.
4.       Cover potatoes tightly in foil.
5.       Place covered potatoes on the bottom of your crock pot and then place the chicken on top.
6.       Cover and cook on low about 6 hours. Juices should run clear, not pink, when the chicken is done.
At this point, your chicken and potatoes are cooked and are ready to enjoy!  If you’d like to crisp up the skin, place your chicken in a roasting pan and place under the broiler until crispy.  The potatoes will stay warm fairly long as long as you keep them wrapped.  If you are broiling your chicken, you could use this time to add a slurry (equal parts water and corn starch—I’d use ¼ c of each) to the juice in your crock pot and turn it on high.  This should create nice brown gravy to complete your meal!  {You may want to skim some of the fat off of the juice prior to adding your slurry.}

To make FREEZER FRIENDLY:
1.       Chop veggies and place in freezer bag and freeze.
2.       Thaw oven roaster in refrigerator for 24 hours prior to cooking.
3.       Follow directions above and enjoy!


Chicken and Dumplin’s
1 lb chicken breast (boneless, skinless)
1 small onion, diced {I use about a cup of frozen diced onion)
2 cans cream of celery soup
1 can of chicken broth
1 can refrigerated biscuit dough
Fresh parsley, chopped
1.       Place chicken breasts into crock pot, along with onion, cream of celery soup and broth.  Cook on low about 6 hours. 
2.       Remove chicken and using a fork shred the chicken and return it back to the crock pot.
3.       Break raw biscuits into pieces and place in crock pot until top layer is covered. Crank that bad boy up to high and cook biscuits for 30 minutes or until done. 
4.       Sprinkle on fresh parsley and enjoy!

To make FREEZER FRIENDLY:
1.       Place all ingredients except for biscuit dough into a labeled freezer bag and freeze.
2.        Place contents of bag into crock pot and follow cooking directions as stated. Enjoy!


Beef Stew with Dumplings
2lbs stew beef, cut in chunks
4 ribs celery, cut into chunks
4 carrots, cut into chunks
2 onions, sliced
shrooms, if you like 'em
1 tsp black pepper
1 tsp dried sage
1/2 tsp ground mustard
2 sprigs fresh rosemary
3/4 c red wine (or be boring and use beef broth)
6 oz can tomato sauce
1 beef bouillon cube
salt to taste

to thicken later:
1/4 c water
1/4 c flour

dumplings:
1/2 c milk
1 1/2 c bisquick mix
1/2 tsp poultry seasoning
1/4 tsp oregano

1.       Sear the beef on all sides and remove from pan.
2.       Add beef, veggies, spices, wine, tomato sauce & bullion into crock pot.
3.       Cook it on low for 8-10 hours
4.       Combine water & flour; add to stew.
5.       Combine dumpling ingredients; drop by spoonful into stew.  Cover and turn on high for 30 minutes.

To make FREEZER FRIENDLY:
1.       Combine all ingredients except for slurry and dumplings into freezer bag and freeze.
2.       Follow directions from 3-5 and enjoy!


Slow Cooker Spaghetti
1 lb ground beef
1/2 onion, diced
1 garlic clove, minced
24 ounces spaghetti sauce
8 ounces (uncooked) spaghetti, about 2/3 of a 13.25 oz box, break into small pieces before adding to meat mixture
2 cups low fat ricotta cheese
1 cup skim mozzarella cheese, shredded
1/2 tsp ground black pepper
Kosher or sea Salt to taste

1.       Sauté onion and garlic until softened, about 2-3 minutes. 
2.       Add beef and cook in a large skillet over medium heat, breaking into small pieces while cooking. Ensure the beef loses its pink color before removing from heat. Drain, discard any fat and set aside.
3.       Combine meat with marinara and broken spaghetti pieces.
4.       In a medium bowl combine cooked meat with the remaining ingredients
5.       Add to slow cooker. Cover and cook on low 2-3 hours or until spaghetti is al dente and cheese is bubbly.
6.       Serve and sprinkle with parmesan if desired.

To make FREEZER FRIENDLY:
1.       Follow directions up to and including numer 4. 
2.       Allow all cooked mixtures to cool before mixing with other ingredients. 
3.       Place cooled ingredients in labeled freezer bag and freeze.
4.       Cook as stated and enjoy!


Easy Peasy Pulled BBQ Chicken
1.5 lbs chicken breasts (boneless/skinless)
1 Tablespoon Brown Sugar
1 Tablespoon Thousand Island dressing
1 bottle of BBQ Sauce

1.       Place all ingredients in a slow cooker and cook on low 4-6 hours
2.       Shred chicken and enjoy on buns!

To make FREEZER FRIENDLY:
1.       Combine all ingredients into freezer bag and freeze.
2.       Pour contents into crock pot and cook as directed.  Enjoy


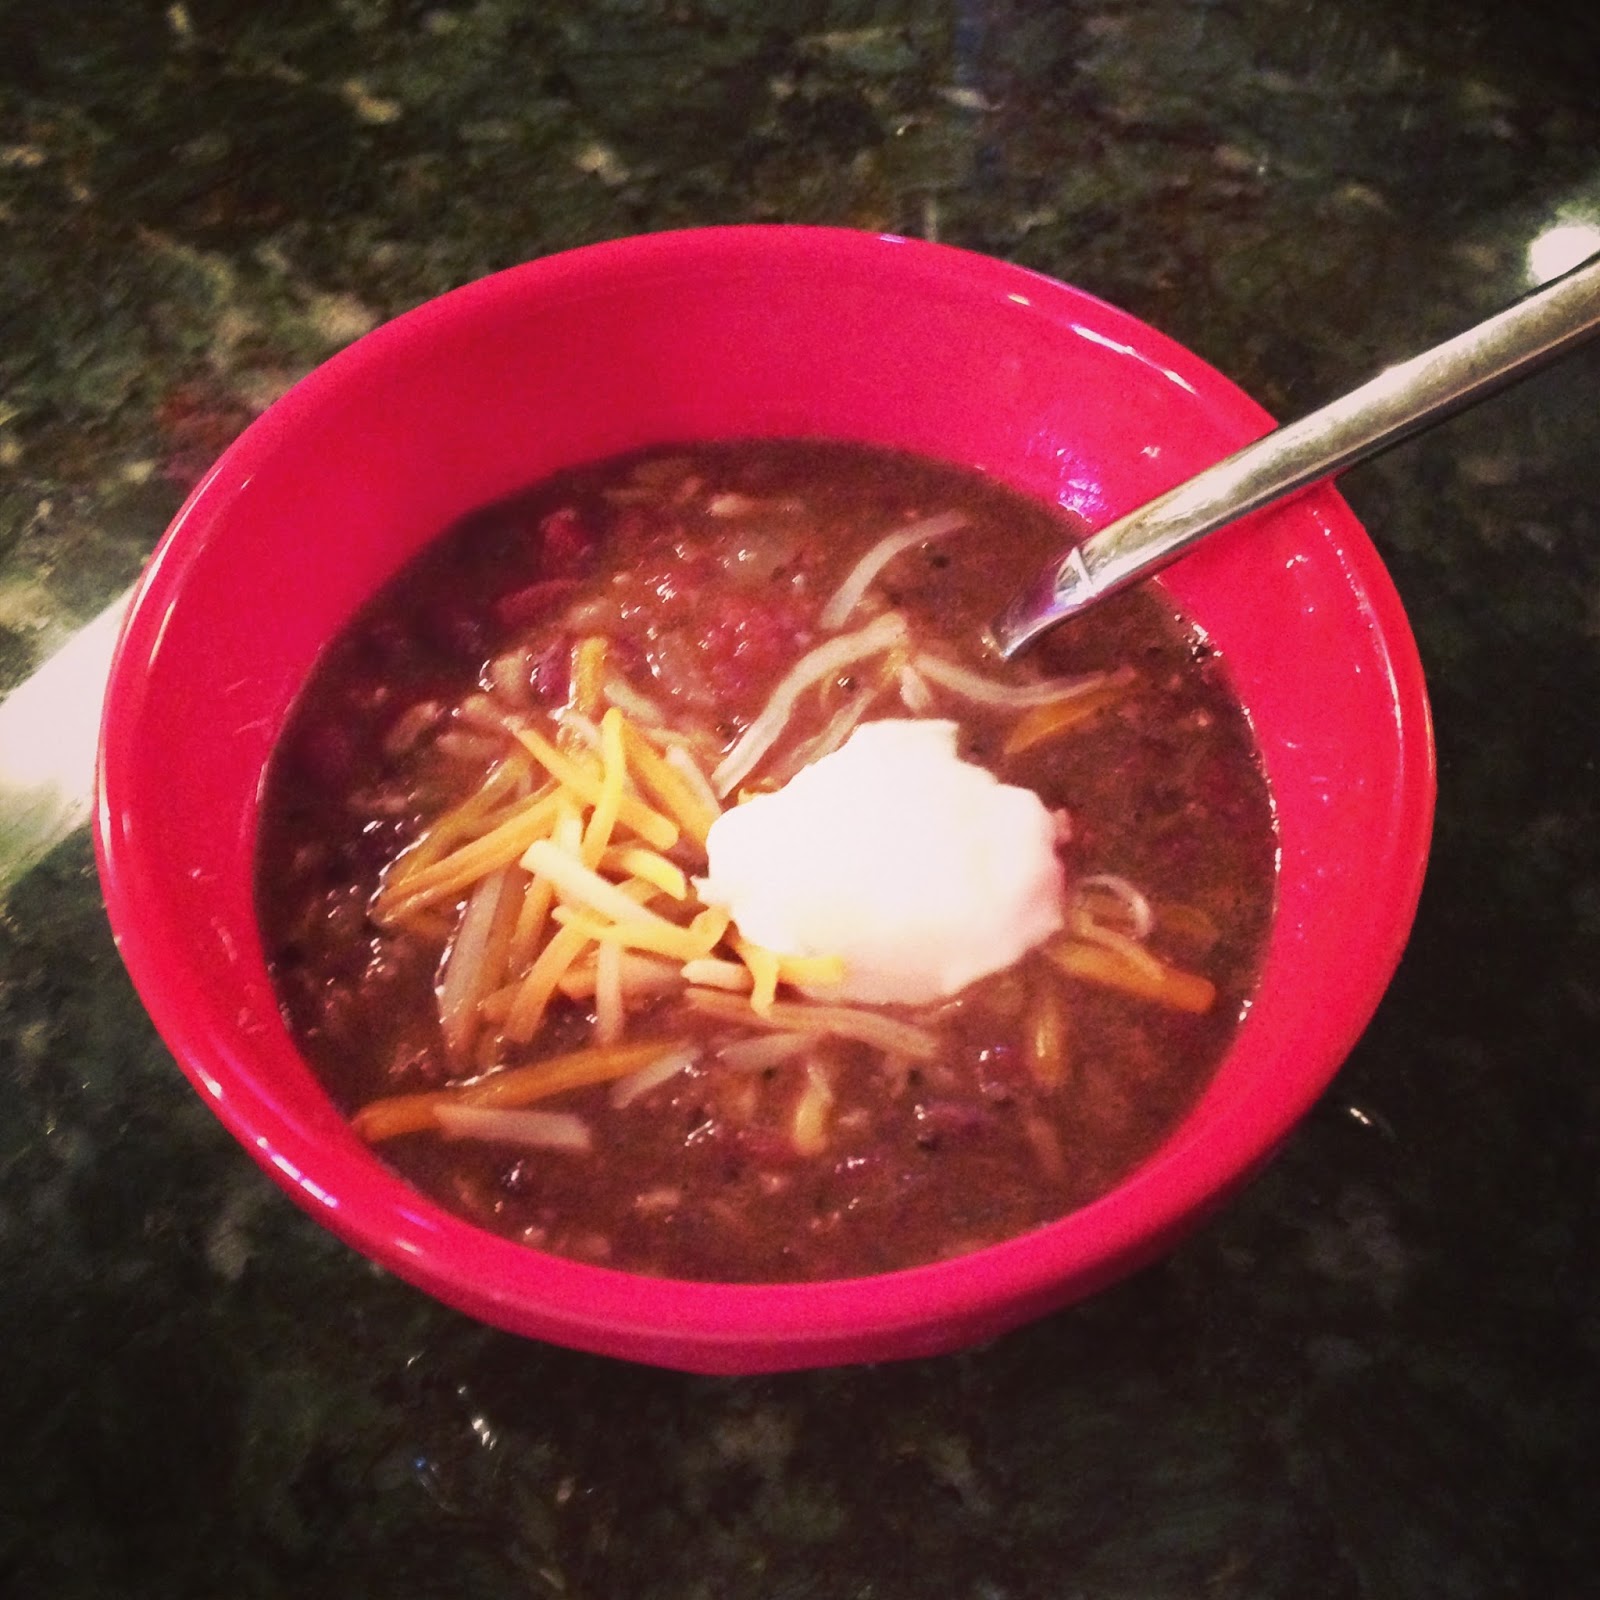
Angela’s Slow Cooker Chili
1.5 lbs lean ground beef
2 small onions,  diced
1 yellow bell pepper, diced
3 cloves garlic, chopped
2 cans (14.5 oz) kidney beans, drained
1 can (14.5 oz) diced tomatoes
1 can (no salt added) tomato sauce
1 cup low sodium chicken or beef stock
3 TBSP chili powder
1 tsp ground cumin
1 tsp dried oregano
½ tsp salt

1.       Combine beef, onions, pepper, garlic, beans, tomatoes, sauce, broth 2 TBSP chili powder, ½ tsp cumin, ½ tsp oregano in crock pot.
2.       Cover and cook on High for 4 hours (or low for 6).
3.       Stir in remaining spices and salt
4.       Serve warm and enjoy!

To make FREEZER FRIENDLY:
1.       Combine all ingredients into gallon freezer bag and freeze.
2.       Pour contents into crock pot and cook as directed.  Enjoy!


Salsa Chicken


1 1/2 lbs boneless chicken breasts
1 can diced tomatoes
1 can rotel chili with tomatoes
1/2 packet taco seasoning
1 bag of frozen corn
3 cups cooked rice

11.      Add all ingredients into crock pot,
22.     cook on low for 7 hours
33.   serve over rice. Enjoy

To make FREEZER FRIENDLY:
11. Combine all ingredients except rice into freezer bag and freeze.
22.       Pour into crock pot and cook as directed.

33.       Serve over rice.

General Tso Chicken
1lb chicken breast, cubed
4 tsp garlic, minced
3 tbsp brown sugar
1 tsp minced ginger
4 tbsp soy sauce
Crushed red pepper flakes, to taste
1 frozen package of stir fry veggies
Slurry (¼ c water mixed with ¼ c flour)

1.       Place first 6 ingredients into crock pot and turn on low.  Cook 5-6 hours
2.       Mix together slurry and add to crock put during the last half hour of cooking.
3.       Turn on high and add veggies after adding slurry.
4.       Serve over rice and enjoy!

To make FREEZER FRIENDLY:
1.       Combine first 6 ingredients into freezer bag and seal.  Place this freezer bag into a larger one and place the bag of frozen stir fry veggies along with it, so they are kept together.
2.       To cook, place contents of the chicken bag into crock pot and then cook as directed. Enjoy!


Steak Fajitas
2 lbs flank steak (or London broil…that’s what I got on sale)
1 teaspoon chili powder
1 ½ teaspoon cumin
½ teaspoon paprika
½ teaspoon salt
¼ teaspoon black pepper
2 tablespoons soy sauce
1 (7oz) can of green chilies
4 cloves garlic, minced
3 bell peppers, any color, cut into slices
1 large onion, cut into slices

1.       Mix together spices and rub on steak.
2.       Slice veggies and place in crock pot.
3.       Place steak on top of veggies and sprinkle with garlic and soy sauce.
4.       Cook on high 5-6 hours until steak can be shredded easily.
5.       Serve on warm tortillas and enjoy!

To make FREEZER FRIENDLY:
1.       Rub spices on meat and slice veggies. 
2.       Place ingredients into freezer bag and freeze.
3.       Pour contents into slow cooker and cook according to directions. Enjoy!


Balsamic Pork
2lb pork tenderloin
½ tsp ground sage
¼ tsp black pepper
½ tsp garlic powder
½ c water
For the glaze:
½ c brown sugar
¼ c balsamic vinegar
2 tbsp soy sauce
½ c water
1 tbsp corn starch
1.       Rub spices on tenderloin and place in slow cooker with water.
2.       Cook on low 6-8 hours.
3.       About an hour prior to end time, combine glaze ingredients in small pan and heat on low until mixture thickens. 
4.       Baste roast several times during the last hour of cooking.  Drizzle remaining glaze on roast before serving.

To make FREEZER FRIENDLY:
1.       Rub spices onto pork loin and place in bag labeled with “add ½ cup water” and freeze.
2.       Cook as directed, making glaze the day of. Enjoy!


Loaded Potato Soup
4 lbs of potatoes, peeled and cut into chunks
3 cloves garlic, minced
½ tsp salt
½ tsp pepper
1 chicken bouillon cube
8 cups water
1 16oz package of cream cheese, cubed
Toppings:
Cheese
Bacon
Green onion
Dollop of sour cream

1.       Add all ingredients except for the cream cheese and toppings into crock pot and cook on LOW for 6-8 hours.
2.       Half hour prior to end time, add cream cheese and cook for an additional 30 minutes
3.       Use an immersion blender to get desired consistency (this is an optional step).
4.       Give it a good stir and serve using toppings of your choice!

To make FREEZER FRIENDLY:
1.       Cook completely according to directions. 
2.       Allow soup to cool and put into containers. Freeze.
3.       Thaw and reheat over low heat.  Stir frequently.  Enjoy!
(Adapted from: http://www.penzeys.com)


Crock Pot Pulled Pork
2lb boneless pork tenderloin
1 1/2 cups ketchup
4oz tomato sauce
2 TBPS brown sugar
1 TBSP molasses
1 TBSP Worcestershire sauce
2 TBSP BBQ sauce
1 TBSP apple cider vinegar
1/4-1/2 tsp cayenne pepper
Kaiser rolls

(Rub)
1tsp garlic powder
1TBS onion powder
1/4 tsp red pepper flakes
1/2 tsp black pepper

11.       Mix the rub ingredients together and rub into pork.  
22.       Allow to sit over night. 
33.       Place in crock pot for 1 hour on high.
44.       Reduce heat to low and allow to cook for four hours.
55.       Cut pork into chucks, pour in remaining ingredients.
66.       Cook on low for 1 hour then shred pork and serve on Kaiser rolls.
                                                           
To make FREEZER FRIENDLY:
11.       Make rub and apply to pork.
22.       Wrap tightly and freeze
33.       Place in crock pot and follow cooking directions. Enjoy!