Monday, July 29, 2013

Freezer and FIGURE Friendly Meals

freezer-meals-healthy


Want to stock your freezer with delicious and nutritious meals for your family?  Struggling to find freezer friendly meals that aren’t loaded with heavy portions of cheese, butter, and cream but light on veggies and whole grains?  No worries – there’s an RD in our cooking club and it’s me, Meghan!  I’ve figured out how to make freezer meals well balanced and packed full of nutrition.  It’s easy if you follow these tips:

Opt for Healthier Freezer Friendly Recipes
I’ve broken it down by category for freezer friendly dishes.  Once you know key ingredients to steer clear of (cream of anything soup, for example) you’ll get the hang of it.  Then you can pick your favorite recipes and create a game plan to stock your freezer.

Chili, Soup, and Stew:
·         Lighten up chili by using lean meats and poultry like 90% or more lean ground beef, ground chicken or turkey breast.  You can even make a vegetarianchili by using a mixture of your favorite canned beans.  Chili freezes well and is a hearty meal on its own, so pair with baked tortilla chips (Try Utz baked tortilla chips), salsa, and guacamole – ditch the cheese and sour cream, you won’t miss it.
·         Broth based soups are a freezer rock star.  Prepare a large pot of soup that contains plenty of veggies.  Simply defrost and pair with a healthy salad or sandwich on whole grain bread for a healthy and filling dinner.  Try these classics: beef and barley, chicken noodle, lentil, or minestrone.
·         Stews freeze well and are versatile.  You can prepare them and freeze or prep a slow cooker kit to freeze and cook later.  No matter what stew you’re making, be sure to add plenty of vegetables, use lean cuts of beef, and opt for low-sodium broth.

Casseroles and Other Entrées:
  • Most casseroles can be modified to cut calories by halving the amount of cheese, using milk in place of cream, and soft tub margarine instead of butter.  Steer clear of recipes that call for “cream of…” soups for thickening and opt for ones that include plenty of veggies like Mexican lasagna bake and polenta ragu bake.
·         Make a lighter version of lasagna with ground chicken or turkey breast.  Add chopped mushrooms to the meat mixture and chopped frozen spinach (thawed) to the part-skim ricotta cheese mixture.  Use whole wheat lasagna noodles and start layering!
·         Sometimes, sides can be easier to whip up during a weekday, but the main dish may slow you down.  Make ahead main dishes like meatballs (90% or more lean ground beef), grilled chicken, or even marinated fish.  Make a main dish salad with grilled chicken or steam veggies to pair with your fish!

Take Some Help from the Supermarket
Sometimes, all you need is a little help from the freezer section of your local supermarket.  Load up on microwave ready sides and vegetables. 
·         Stock up on steam-in-bag frozen veggies and frozen edamame.
·          For healthier frozen starchy sides try some of my favorites:  Birds Eye baby potato or brown and wild rice blend, Alexia Foods potato sauté varieties, and Village Harvest frozen whole grain varieties (quinoa, barley, farro, brown, red, and wild rice).
*Don’t forget to keep a stocked pantry and refrigerator for balanced meals.  Here’s what I always have on hand:
·         Bagged salads and fresh vegetables (whatever is in season and on sale!)
·         Microwaveable brown rice – in different varieties – Jasmine, basmati.
·         Sweet and regular potatoes
·         Quinoa

Freezer Safe
Keep these points in mind for food safety:

  • Divide cooked foods into smaller portions in shallow containers. Soups and stews should be put into portions that are two to three inches deep.  Stir them while cooling to speed the release of heat.
  • Place meals directly in the refrigerator, then transfer to the freezer once they're cold.
  • Defrost meals in the refrigerator or microwave, never on the counter.
  • Reheat all frozen meals to 165ºF and soups and sauces should be brought to a boil.
  • Frozen meals should be used within 2 months.
Hopefully you find these tips and tricks helpful!  I'm happy to answer any questions you have!


Cook happy & healthy!
freezer-meals-blog

Friday, July 26, 2013

Freezer Friendly Visits Florida

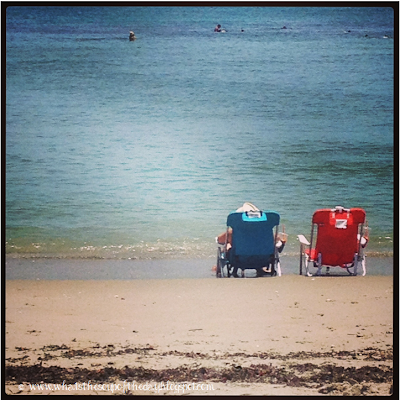
It's about time to end our trip here in Florida :0( We had a blast....cooking, reading and going to the beach! 

freezer-meals-blog
Angela (& Baby W), Harp & Meg @ Bathtub Beach

freezer-meals-blog
Mom day at the Beach for Angela's birthday!


We certainly couldn't leave without stocking my parents' freezer!  They recently celebrated their 30th wedding anniversary and as a gift, my brother and I got them an extra refrigerator/freezer for their garage (can you tell this family likes to eat?).  So while Angela and I were here we whipped up some of our favorites to leave behind as a thank you for having us.

While we were here we made:
*Shrimp Scampi (doubled the batch so we had it for dinner one night and froze a batch for later)
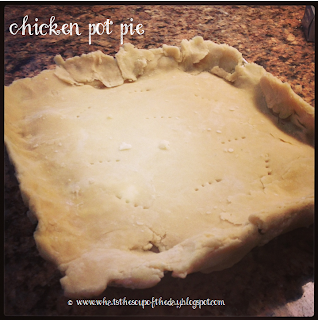
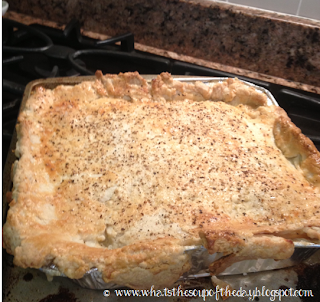
*Chicken Pot Pie (again, doubled so plenty for later cc)
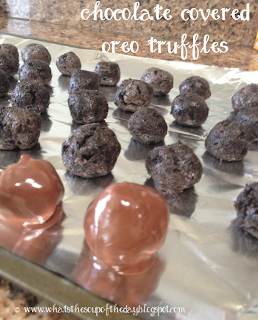
*Chocolate covered Oreo truffles (a Freezer Friendly original)
*Seafood Pot (which can use stock made from the shrimp scampi)
*Blueberry Pie


chicken-pot-pie

oreo-truffles


shrimp-scampi
-2lbs fresh or frozen shrimp   shell on
- 1/4lb salted butter
-2 med size shallots
-4-5 cloves fresh minced garlic
- juice of two med size lemons
- 1/8-1/4 cup of olive oil
-1lb linguine pasta or 2cups rice uncooked 
Salt and pepper to taste

Cooking instructions

Clean and peel shrimp (saving the shells to make seafood stock for a later recipe *see below). In a medium pot, bring water to a boil for pasta (make sure to always add salt to your pasta water) or cook rice according to package. In a medium sauté pan melt 1/2 of your butter into the pan on med heat.  Dice your shallots nice and fine along with the garlic then add to your melted butter. Allow the shallots to get translucent looking then add your oil, lemon juice, and salt and pepper. Turn down and allow to simmer for about 5min. Add shrimp. Reserve 1-2 ladles of pasta water and add to your shrimp mixture. If making this over rice, still be sure to add 1/2 cup of warm water to your shrimp mixture,  when shrimp are pink its done. Serve over pasta or rice. Enjoy
Cooking instructions for freezing:
To freeze: Allow sauce to cool, place in a freezer plastic bag or freezer container, date it and place in the freezer.  Freezer Friendly tip: If you are making this recipe to freeze, do not cook your shrimp all the way or do not add them at all, you can add them either fresh or frozen while re-heating it.

To eat: Allow sauce to come to room temperature. Heat in a sauce pan over medium/high heat. If re-heating from the freezer, bring your pasta to boil to make sure you add your two ladle full of pasta cooking water. If making this over rice, still make sure to add 1/2 cup of warm water to your shrimp mixture. Add your shrimp if you did not have them already half cooked from before. Cook until your shrimp are pink then serve over your rice or pasta!
*seafood stock
Add two cups of water and the shells from the shrimp to a med pot. Bring to a boil and allow to cook for about 20 min. Drain shells but reserve liquid and save, let cool and freeze that stock for a later recipe. Such as our seafood chowder that you can find on our website!!! 


blueberry-pie

chicken-pot-pie

For the filling:
-1 stick of butter
-8 TBS flour
-4 ribs of celery, diced
-1 medium to large onion, diced
-2 large carrots, diced
-1 16oz bag of frozen mixed veggies
-1 lb of chicken, cooked & shredded
-about 6-8 cups of chicken stock, heated 
-1tsp poultry seasoning
1 bay leaf
salt and pepper to taste


For the pastry: (Ina Garten's recipe...NEVER fails)
For the pastry:
3 cups all-purpose flour
1 1/2 teaspoons kosher salt
1 teaspoon baking powder
1/2 cup vegetable shortening
1/4 pound cold unsalted butter, diced
1/2 to 2/3 cup ice water
1 egg beaten with 1 tablespoon water, for egg wash
Flaked sea salt and cracked black pepper
For the pastry, mix the flour, salt, and baking powder in the bowl of a food processor fitted with a metal blade. Add the shortening and butter and mix quickly with your fingers until each piece is coated with flour. Pulse 10 times, or until the fat is the size of peas. With the motor running, add the ice water; process only enough to moisten the dough and have it just come together. Dump the dough out onto a floured board and knead quickly into a ball. Wrap the dough in plastic and allow it to rest in the refrigerator for 30 minutes.


Cooking instructions:
1. Make dough according to above directions.  Preheat oven to 375.
2. Melt butter  over medium heat in large sauté pan, add celery, onions, carrots, poultry seasoning, salt and pepper and bay leaf.  Sauté until soft, about 5-7 minutes
3. Slowly add flour and whisk into butter/veggie mixture until incorporated.  Stirring constantly, cook mixture about one minute.  Continuing to whisk, slowly add in warm chicken stock to veggies. Stop and stir to combine occasionally, stopping when you get to the desired consistency for your filling (add more liquid if you like it soupy...add less if you like it more like a stew).
4. Let simmer, taste and season as needed.  Add chicken and about half of the bag of frozen veggies.  Feel free to add the whole bag, or a bag of just peas! It's totally up to your preference!
5. Turn off burner, ladle filling into tins and cover with dough (if eating right away).
6. Brush dough with egg wash, salt and pepper. Poke several holes into pastry dough to allow steam to escape.
7. Bake in preheated oven (on a cookie sheet) at 375 for 40 minutes, or until crust is golden brown.

To freeze:
Follow directions up to number 5, but allow mixture to cool once in tins before putting on pastry dough. Brush with egg wash, salt and pepper, wrap tightly & label and pop into your freezer.

To eat:
Thaw overnight in fridge.
Remove foil, and poke several holes into pastry dough to allow steam to escape.
Place on baking sheet to catch and spills and bake at 375 for about 40 minutes.


seafood-pot


-2 28oz cans diced tomatoes
-1 small can of tomato paste
-3 cans of seafood stock (or stock from shrimp shells from shrimp scampi)
-1 large onion, diced
-1 large potato, peeled and diced
-2 bell peppers, diced
-1 jalapeno, diced
-3 tablespoons butter
-1 tsp oregano
- tsp parsley
-1 bay leaf
-3 cloves garlic, minced
-1/2 lb of shrimp, peeled & deveined (you could also use the shells and make some seafood stock from them)
- one dozen clams, cleaned
- one dozen mussels, cleaned
-2 tsp chopped cilantro
{you can really throw in any kind of seafood you like...we've added lobster tails, king crab legs, fish...}

To cook:
1. Melt butter in the largest pot you have.
2. Add onions, garlic, and bell peppers and saute 5-7 minutes.
3. Add diced potato, tomatoes, seafood stock and tomato paste. Stir well to incorporate the paste.
4. Add spices and salt and pepper to taste (go easy on salt, the seafood you add will also add salt) and bring to a simmer for about 30 minutes.
5.  Add clams and cover for about 5 minutes.
6. Add mussels and cover for 3 minutes
7.  Add shrimp.  At this point, the clams and mussels should be about open.  Once most of the clams and mussel shells are open, serve immediately with crusty bread and enjoy! Garnish with cilantro
{Toss any clams or mussels that have not opened}

To freeze:
Follow directions up to and including number 4.
Cool soup completely
{If you are adding fish and/or shrimp to the pot, you could add it uncooked to the cooled soup before freezing OR just add fresh the day that you reheat the soup.  Do not freeze clams or mussels}
Put into containers and label.

To eat:
Reheat soup on stove in sauce pan.
Once to a simmer, add seafood and follow directions 5-7.
*This base would also be great with sausage and raviolis for a hearty dinner if you didn't want to add the seafood*


(Freezer Friendly Original)
-1 block of cream cheese, softened
-1 1/2 cups powdered sugar
-3 sleeves of Oreo cookies
-1 bag of chocolate chips

To make:
1. Mix softened cream cheese with powdered sugar.
2. Crush oreo cookies (in a food processor)
3. Mix crushed cookies with cream cheese mixture
4. Cover and chill mixture for 30 minutes
5.Roll chilled mixture into balls, about tbsp in size
6. Place balls onto a parchment paper lined baking sheet and chill for 30 minutes
7. Melt chocolate in small bowl for 30 second intervals until melted.
8. Dip cookie balls into melted chocolate, shaking off any excess and place back onto parchment lined sheet
9.  Chill until outer layer has hardened and enjoy!

To freeze:
Make as directed and place into a container and freeze.

To eat:
Eat directly from the freezer, or place in fridge to thaw.  ENJOY!


Stay full & Cook with Love!

freezer-meals-blogfreezer-meals-blog


Saturday, July 20, 2013

Husband Approved Breakfast Sandwiches

So Meghan and I are in Florida, actually escaping the heat wave that's at home believe it or not!  Meg has mentioned before how we made sure to stock our freezers with husband approved meals before we left....otherwise they'd go hungry or live off of take out wings and burgers. 

I made my hub some yummy breakfast sandwiches so I could be sure he was eating all of his meals while we are away!

Here is my super simple recipe for the breakfast sandwiches.  They freeze pretty well and can be adapted in many ways.  Meg has used my recipe before to make them for her hub, and when she does hers, she likes to whisk the eggs with a bit of veg first, and then bake in muffin tins.  Take this quick and easy recipe and make it your own and please come back and let me and the girls know how you make yours for your family to enjoy!!


freezer-breakfast-sandwiches


Freezer Breakfast sandwiches

-1 dozen of English muffins or mini bagels
-1 dozen eggs
-Your choice of bacon, turkey bacon, breakfast sausage or thin cut pork roll ( enough to make 12 sandwiches )
-Your choice of cheese 1/2lb ( I used American but I have used cheddar before and they came out equally as delish)

To Cook:
1.Preheat your oven to 350 degrees. Spray a 12 cup muffin tin with non stick cooking spray. 2. Crack your eggs into the muffin tin. Cook in preheated oven for 10 min or until the eggs starts to separate from the pan.
3. On a cookie sheet with a wire rack on top, place 12 strips of bacon and cook that along with the eggs, the bacon takes about 15-20 min on the same temp. For the sausage, pre-cook that on the stove top and set aside. If you decide to do the pork roll, it is already cooked so I have that ready for the end and assembling.
{I let the eggs and bacon or sausage cool slightly before starting the next step.}
4.Take the cooked bacon, sausage or slices of pork roll, cheese, English muffins or bagels and eggs and start to layer however you please. 
To Freeze:
After each sandwich is assembled, wrap each in tin foil or you can vacuum seal them individually. Label them and stick them in the freezer bag with the date on it.
To Eat:
To reheat them, make sure they are thawed and I put them right into my toaster over on med/high heat for about 5 min. If you do not have a toaster oven, you can also place them in the microwave for a min on high. They toast or heat up nice and ready to enjoy!

Cook with love,
freezer-meals-blog

Friday, July 12, 2013

Bonus Meals

I love love LOVE comfort food! And I love love LOVE my crock pot (I get lazy sometimes..and by sometimes, I mean all the time).  It may be the middle of summer, but I wanted comfort food. This beef stew recipe was the perfect choice..1.) it's comfort food, 2.) I can make a bonus meal out of it, and 3.) it has dumplings.  I'm the carb queen!

The recipe is so super simple.  Next time you shop, grab double the ingredients and make two meals out of it.  This is also a great recipe for beginner freezer cookers, because you can put all of these ingredients (sans the dumplings) into a gallon freezer bag and just dump it in the pot the day you are ready to eat.  Easy-peasy.
I've adapted the recipe from http://www.amazingsouprecipes.com.  I planned on making a bonus meal out of this recipe, so I bulked up on the veg to stretch it a bit more as well.  In the end, my hub & and I each had seconds for dinner, plus each had a serving for lunch the next day.  AND I made two pot pies..from one recipe!

crock-pot-beef-stew


Beef Stew with Dumplings
{makes 6-8 servings}
2lbs stew beef, cut in chunks
4 ribs celery, cut into chunks
4 carrots, cut into chunks (those mini carrots work great...no cutting--remember I'm lazy)
2 onions, sliced
shrooms, if you like 'em
1 tsp black pepper (now, this is a lot, but I really enjoy the depth it gives, but you could cut it back to 1/2 or                                even 1/4 tsp)
1 tsp dried sage
1/2 tsp ground mustard
2 sprigs fresh rosemary
3/4 c red wine (or be boring and use beef broth)
6 oz can tomato sauce
1 beef bullion cube
salt to taste

to thicken later:
1/4 c water
1/4 c flour

dumplings:
1/2 c milk
1 1/2 c bisquick mix
1/2 tsp poultry seasoning
1/4 tsp oregano

Instructions:
1. Sear the beef on all sides and remove from pan. (I skipped this step..it's lazy I am.)
2.  Add beef, veggies, spices, wine, tomato sauce & bullion into crock pot (or gallon bag).
3. Cook it on low for 8-10 hours
4. Combine water & flour; add to stew.
5. Combine dumpling ingredients; drop by spoonful into stew.  Cover and turn on high for 30 minutes.

freezer-meals-blog
ENJOY! I sure did...
(beer is a comfort food too, yes?)


Bonus Recipe:

Beef Pot Pies

Before I added the dumplings, I scooped out stew and ladled it into 2 disposable tins.  I had pastry dough in my freezer that I had taken out the night before.  I covered the two tins (once completely cool) with the dough and wrapped them up tightly & labeled them and added them to my freezer.  Angela & I will be in Florida for about 2 weeks and our husbands can just stick the pot pies in the oven (that's about as fancy as they get in the kitchen).
beef-stew-pot-pies


Do you still crave comfort food in the summer?

Stay full! 
freezer-meals-blog

Wednesday, July 10, 2013

Playing Catch Up!

It's been a while since my last post..but that doesn't mean I haven't been busy in the kitchen!

I've been busy meal planning, food shopping, cooking and ugh, cleaning.  I love cooking, but just hate cleaning up the mess I make.  Probably it's because, as my husband often reminds me, that whenever I cook I dirty every dish in the house.  Hey, making a mess is half the fun, right?

Speaking of fun, let's talk ice cream.  So last week my daughter and Angela's niece had a play date.  While they were playing, I ran out to go to a doctor's appointment...and while I was gone they whipped me up a blueberry pie.  And this is NO ordinary blueberry pie.  It's the best, most amazing, delicious,you-need-it-in-your-belly-right-now kinda pie.  Now most people put a scoop of ice cream on top of their pie.  And that's a great idea... but I had a better one.  After I ate half the pie (literally)...I was in a pie coma.  And while in that lovely pie coma, I had an idea.. why not put the pie IN the ice cream?  I love my ice cream maker, and don't use it as often as I'd like so it was a no brainer!

I made a basic vanilla ice cream and after it had churned in my ice cream maker, I scooped half of it into a Tupperware, then crumbled 1/4 of the pie on top of the ice cream.  I repeated that process with the remaining ice cream and pie.  Then I took a spatula and smoothed the top of the ice cream down and made sure all pie pieces were covered by the ice cream.  Let it set up and freeze...and voila! Delicious, seasonal, homemade ice cream! Can't beat it!


Angela's blueberry pie
Crust
- 2 1/2 cups all purpose flour
- 3/4 tsp salt
- 2/3 cup shortening
- 8 to 10 Tbs of cold water
In medium bowl stir together the flour and salt. Using a pastry blender, cut in the shortening until pieces are pea size. Sprinkle 1 Tbs of water over part of the flour mixture. toss with a fork, Push moistened pastry to the side of the bowl. Repeating moistening flour mixture, using 1 Tbs of water at a time, until flour mixture is moistened. On a lightly floured surface, roll out and line your baking plate. There will be extra along the side, just cut along the side to make it even. I like a thicker crust, so if you like it thinner, cut this in half.
Filling
- 3/4 cup sugar
- 1/2 cup all purpose flour
- 1 tsp ground cinnamon
- 5-6 cups of fresh blueberries ( I use 3 containers or 6 small)
- 1 Tbs of lemon juice
Topping
- 1/2 cup all purpose flour
- 1/c cup packed brown sugar
- 1 1/2 tsp ground cinnamon
Heat oven to 425. In large bowl, mix together the sugar, flour and cinnamon. Stir in the blueberries. Pour the mixture into a pastry lined baking plate. sprinkle with lemon juice. Sprinkle your topping all over the top evenly. Cut butter into small pieces and place all over the blueberries. Bake for 34-45 min. Let sit for about 2-3 hours before eating to allow it to set.
Enjoy

I used my cuisinart ice cream maker and slightly adapted their vanilla ice cream recipe:

Vanilla Ice Cream
1 & 1/2  cups Vanilla Almond Milk
1 & 1/8 cups granulated sugar
3 cups heavy cream
1 tablespoon pure vanilla extract


In a medium mixing bowl, use a hand mixer on low speed to combine the milk and granulated sugar until the sugar is dissolved, about 1 to 2 minutes. Stir in the heavy cream and vanilla. Turn the machine on; pour the mixture into freezer bowl, and let mix until thickened, about 20 to 25 minutes. The ice cream will have a soft, creamy texture. Transfer half of the ice cream into a Tupperware  then crumble 1/4 of a pie on top.  Repeat process with remaining pie & ice cream.  Gently press a layer of plastic wrap on the ice cream, then cover with lid and freeze (about 8 hours).  ENJOY!

***Notes: Next time I make this, I think I will smush the blueberries in the pie before adding the pie pieces to the ice cream...the berries have such a high water content and become mini ice cubes in the ice cream.**

What's your favorite flavor ice cream in the summer?

Stay full!